Renogy 200 Watts 12 Volts Monocrystalline RV Solar Panel Kit with Adventurer 30A LCD PWM Charge Controller and Mounting Brackets Review (2026)
Updated September 21, 2026 · Research-based review
Our verdict
A reasonable entry point into RV solar for owners wanting basic panel charging with a flush-mountable controller and an LCD readout. The included Adventurer 30A controller uses PWM rather than MPPT technology, so it converts less of the panels' potential output into usable charging current than a pricier MPPT system would.
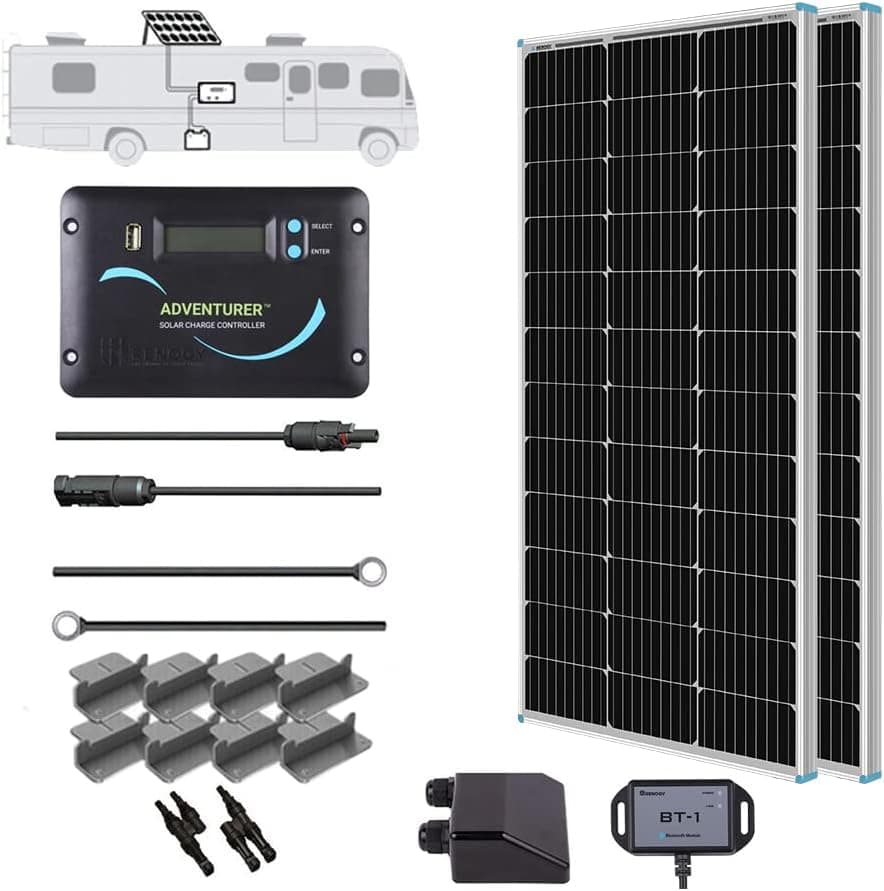
Renogy's 200 Watts 12 Volts monocrystalline RV solar kit with the Adventurer 30A LCD PWM controller and mounting brackets.
Price range: See on Amazon
What we liked
- + Adventurer controller is designed for flush wall mounting inside an RV
- + LCD screen shows charging status without an app or extra meter
- + Mounting brackets included, so panels are ready to attach to the roof
Trade-offs
- - PWM technology limits harvest compared with MPPT controllers
- - Roof drilling and sealing are still needed for a bracket install
What is in the kit
This Renogy kit bundles two 100 watt monocrystalline solar panels for a combined 200 watts, the Adventurer 30A PWM charge controller, mounting brackets, connectors, and cabling needed to wire the panels to the controller. Buying panels and a controller together as a matched kit removes the guesswork of pairing compatible components separately, which is a common source of mistakes for first-time solar installers. Each 100 watt panel is rated with an open circuit voltage of about 22.8 volts and a short circuit current of roughly 5.3 amps, figures that matter mainly for confirming compatibility if you later add more panels to the same controller.
PWM versus MPPT charging
The Adventurer controller uses PWM, or pulse width modulation, charging technology rather than the more efficient MPPT, or maximum power point tracking, found on Renogy's higher-tier controllers. PWM controllers are simpler and less expensive, but they generally harvest less usable energy from the panels, particularly in cooler weather or partial shade, because they cannot adjust voltage and current independently the way MPPT controllers can. For a basic 200 watt setup meant to maintain a battery bank rather than run heavy loads, PWM is a reasonable and cost-effective choice, though owners planning to scale up their solar system later may eventually outgrow it.
Mounting and installation
Mounting brackets are included for attaching both panels to an RV roof, and the Adventurer controller is designed for flush wall mounting inside the RV, which gives it a cleaner, more integrated look than a controller left dangling on wires near the battery. Even with brackets included, installing rooftop solar still requires drilling through the roof to run wiring down to the battery compartment, so proper sealing with RV-rated sealant around every mounting point and wire entry is essential to avoid leaks. This is a project most comfortable DIY RVers can complete in a weekend with basic tools, though running wire through an existing roof penetration or a slide-out gap can save an extra hole to seal.
LCD display and everyday monitoring
The Adventurer controller includes a built-in LCD screen that shows charging status, so you can check how the system is performing without needing a smartphone app or an external battery monitor. This is a practical feature for owners who want basic visibility into solar performance without adding another device to the RV's electrical system. The controller also includes standard protections against overcharging, short-circuits, reverse polarity, and overloads, following a four-stage charging process intended to work safely with sealed, gel, and flooded lead-acid batteries. Checking the LCD periodically also helps catch a loose connection or a shaded panel before it becomes a bigger charging problem.
Who this kit suits
This 200 watt kit suits RV owners taking their first step into solar who mainly want to maintain a lead-acid or AGM battery bank during storage or light boondocking rather than run heavy continuous loads like an air conditioner. Its lower price compared with MPPT-based kits makes it an accessible entry point, but owners with larger battery banks, lithium batteries wanting faster charging, or plans to expand to 400 watts or more down the line should compare the efficiency gains of an MPPT controller before committing to this PWM-based system. Weekend campers who mostly plug into shore power and only need light top-up charging will likely find this kit sufficient as is.
Frequently asked questions
What is included in this solar kit?
Two 100 watt monocrystalline panels, the Adventurer 30A PWM charge controller, mounting brackets, and the cabling and connectors needed to wire the system together.
Is this a PWM or MPPT controller?
It is a PWM controller, which is simpler and less expensive than MPPT but generally harvests somewhat less usable energy from the panels.
Can the controller be mounted inside the RV?
Yes, the Adventurer controller is designed for flush wall mounting inside the RV rather than sitting loose near the battery.
Does the kit work with lithium batteries?
The controller's listed charging profiles are built around sealed, gel, and flooded lead-acid batteries, so check compatibility before pairing it with a lithium battery bank.
Prices change often, so check the current price and availability on Amazon.
Check price on AmazonRV Upgrade Hub may earn a commission from the link above.